Leading European chemical etching specialist, Precision Micro, has recently invested over £100K in a state-of-the-art dimensional measurement system. This adds another element to its impressive portfolio of services available to manufacturers seeking to mass manufacture feature-rich, complex metal parts to exacting tolerances in a timely and cost-effective manner.
In 2012, the international aerospace, defence, and electronics group Meggitt PLC acquired Precision Micro, and the investment in the new measurement system shows the extent to which Meggitt is backing Precision Micro, which is already established as Europe’s leading photochemical etching company.
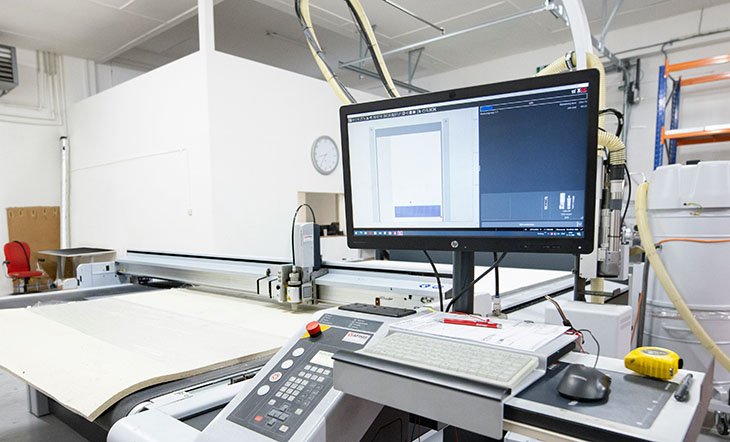
The measuring system selected was from multi-sensor measurement technology experts Optical Gaging Products (OGP®). Many technologies were analysed by Precision Micro before selecting the OGP solution.
Various attributes made it the best fit for Precision Micro’s needs, including its speed and repeatability. It was also found to be easy to use, the machine being driven from customer CAD data rather than necessitating manual preparation. Customer inspection programmes can be loaded directly into the machine, and are fully editable, providing obvious benefits to both customer and Precision Micro.
This also has a huge positive impact in cycle times, and makes the entire measuring process more accurate and reliable by minimising the chance of human error. Any automated system is welcomed as it also frees up quality engineers for other mission critical tasks.
The OGP technology represents the fifth Coordinate Measuring Machine (CMM) in Precision Micro’s facilities, and there are plans for a sixth in 18 months. The overall plan is to place these CMMs at strategic points throughout the production process in order to move towards greater and greater automation, and streamline the evaluation of and attainment of necessary internal and external quality requirements.
The CMMs that Precision Micro had in-house before the purchase of the OGP machine have a bed size of 600 x 600 mm, and output text data which had to be extracted and input into other documents for analysis. The OGP machine has a bed size of 1500 x 900 mm giving Precision Micro greater scope to measure larger batches of components, again allowing reduced lead times and associated cost savings. It also allows the company to etch larger components (now up to a maximum of 1500 x 600 mm). In the field of photochemical etching, this is an exceptional offering, and represents perhaps the largest available component size or sheet size of any service provider globally.
This removes previous constraints on product design and optmises the manufacturing process for numerous clients. In addition, the OGP machine gives live process data rather than text data, and has built-in control charts and statistical analysis software.
The machine overlays inspection data on-top of the original CAD file, and allows precise analysis of variation between design intent and manufactured component. Automatic reports are then produced in a clear and easy to analyse format.
The new technology can also detect features that it was previously impossible to pick out. It can detect tonal differences on a component to help in the location of the desired measurement point.
The investment in the OGP technology was driven in part by a leading aerospace customer for a challenging aluminium etching project. The application required the inspection of six zones with numerous features as well as the overall profile of each part. Using previously purchased CMMs it took about 600% more time to inspect each part when compared with the OGP machine. In addition, with the larger bed size, instead of parts being inspected one by one, larger numbers (and even full production batches of parts) can be analysed at the same time.
Across industry, Precision Micro has always had a reputation as a pioneer in the area of optical CMM, and the investment in the OGP machine ensures that the company remains at the forefront of inspection and measurement capabilities. In today’s world, improved productivity is every manufacturer’s goal. The addition of this innovative measurement technology provides the opportunity for achievement and maintenance of unparalleled quality and productivity for Precision Micro’s customers.
As Precision Micro continues to reinforce its reputation as a world-class manufacturer, it is vital that it continues to use best-in-class technology solutions at every stage of the design and manufacturing cycle. The investment in the OGP® machine is an initial stage in an on-going investment in state-of-the-art inspection equipment to maintain Precision Micro’s world-class manufacturing credentials.
For many sectors that Precision Micro serves — such as the automotive and aerospace industries which have driven this recent investment — speedy time-to-market and absolute precision need to be delivered with 100% verification and zero failure rates. The recently purchased dimensional measurement machine helps to ensure competitiveness and cost-effective part manufacture, while at the same time reducing cycle times.
While photochemical etching as a manufacturing process is characterised by its ability to manufacture complex and feature-rich parts, when manufacturing parts for super-critical applications, it is vital that the process chosen is not only cost-effective and allows adherence to time-to-market objectives, but is also able to adhere to extremely tight tolerances and produces (verifiably) accurate parts in volume with minimal or no wastage. Investing in OGP’s technology pushes Precision Micro’s and photochemical etching’s capabilities even further into these exacting market-places, where components are often safety-critical, where greater and greater precision is required, and where there is less margin for error.


